Creating blazor model classes
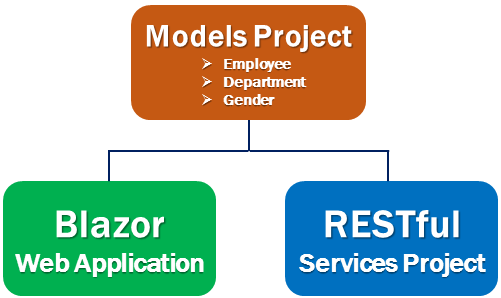
As we progress through this course we will be building Employee management system that allows us to Create, Read, Update and Delete employees. The following are the model classes we need.
- Employee
- Department
- Gender
Create Blazor Model classes
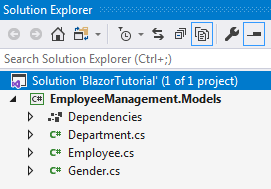
Create a new .NET Standard Class Library project. Name the project EmployeeManagement.Models. Name the solution BlazorTutorial.

If you are wondering why we chose a .NET standard class library project. Well, it allows us to reuse these models in many different project types across the .NET ecosystem.

We will be using these models in a Blazor web application project. As we progress through this course we will be creating ASP.NET core RESTful services. These services provide the data our Blazor project needs. Even in the RESTful services project we will be using these model classes.
Create Blazor Web Project
Add a new Blazor server project, to the BlazorTutorial solution Name it EmployeeManagement.Web. This is the web application project that allows us to Create, Read, Update and Delete employees.
This project needs the model classes we created above. So add a reference to EmployeeManagement.Models project from EmployeeManagement.Web project.
Right click and make EmployeeManagement.Web the startup project if it is not the start up project already.
Delete the following files and folders from EmployeeManagement.Web project.
- Data folder
- Pages/Counter.razor
- Pages/FetchData.razor
- Pages/Index.razor
- Shared/SurveyPrompt.razor
Changes in Startup.cs
Rmove the following using statement
Remove the following line from ConfigureServices() method
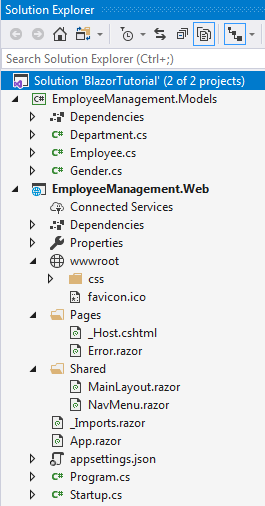
If you are following along, at this point your project should look as below

Create EmployeeList component
In EmployeeManagement.Web project, right click on the Pages folder and add a new razor component. Name it EmployeeList.razor. It is this component that we will use to display the list of Employees.
Include the following @page directive in EmployeeList.razor file. This tells Blazor to render this component when we navigate to the root application URL.
Changes in NavMenu.razor
Remove the following 2 navigation menu items.

No comments:
Post a Comment